RV Detailing Checklist: Exterior Detailing for Your Home on Wheels
A well-kept RV tells a story before you even open the door. The paint has depth, the decals are crisp, the roof is clean, the glass is clear. It is not just vanity. Clean surfaces shed water more effectively, resist UV breakdown, and make inspections easier. A good exterior detailing routine saves owners from costly surprises, like peeling graphics, chalky gelcoat, or rust creeping along seams. This is not the same as washing a sedan in the driveway. A 30 to 45 foot coach brings unique materials, scale, and safety considerations. With the right approach, you can bring professional results to your own pad, even if you only have a Saturday morning and a sturdy ladder.
What makes RV exterior detailing different
An RV is a patchwork of substrates. On one vehicle you might see a fiberglass gelcoat sidewall, painted aluminum panels, polypropylene bumpers, stainless trim, rubber roofing, Lexan vent covers, and a cockpit with tempered glass. Many coaches also wear vinyl decals or printed wraps that do not tolerate the same chemicals or heat as automotive clear coat. The heights and overhangs complicate access, so you cannot rely on the muscle memory built in car detailing.
Water management changes too. A high-pressure rinse can drive water behind gaskets and into slide seals. Aggressive wheel cleaners can etch decorative Alcoa aluminum. Bugs cement themselves across a flat front cap and can etch in a single sunny afternoon. If you understand the materials, you can pick the right tools for each section and move with confidence.
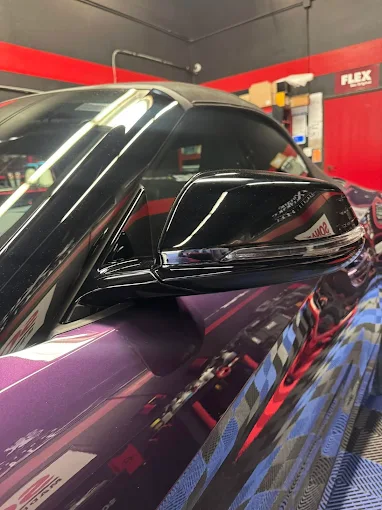
Surface identification and inspection
Start by reading the coach. Fiberglass gelcoat looks like a boat hull, often with a faint orange peel and a slightly thicker edge at seams. Factory-painted panels reveal a clear coat that reacts more like automotive paint. Tap decals and you will hear the change in pitch. On a bright day, oxidation on gelcoat shows as a dull haze. Rub a white towel on an oxidized panel and it will chalk. That chalk translates to drag on your wash mitt and premature pad clogging during car polishing.
Walk the coach before touching a hose. Circle the roof. Lift slide toppers if you can do it safely. Look for failing caulking, torn seals, loose awning screws, stains under clearance lights, and any areas where water might intrude. Check the front cap for rock chips and stress lines. Note problem zones that require targeted chemicals: bug splatter, tree sap, tar, iron fallout on lower panels, and hard water spots on glass.
Safe pre-wash and contact wash
If you can wash in shade, take it. Working on a cool surface buys you time with chemicals and prevents spotting. Rinse from the roof down with a controlled stream rather than a needle jet. Think volume over pressure so you do not drive water under seals. Pre-treat the front cap, mirrors, and leading edges with a bug remover formulated for clear coat and gelcoat. Let it dwell, then rinse again.


A quality contact wash still matters at RV scale. Use a lubricious shampoo and a clean mitt, swapping for an extendable brush with flagged bristles up high. Keep the brush for the roof and upper walls, reserve a separate mitt for lower panels so grit from the belly does not migrate up where your eye level rides. Work one manageable section at a time, rinse often, and do not let soap dry. Slide toppers and awnings get their own gentle cycle, using manufacturer-safe cleaners and a soft brush. Never yank against mildew; let the chemistry and steady agitation do the work.
Decontamination without damage
Road film leaves more than dust. Think of all the metals in brake dust and the minerals in the last campground’s water. On painted lower panels, a mild iron remover saves time during paint correction, but avoid overspray on bare aluminum or polished wheels. Tree sap comes off with a citrus-based cleaner or a light tar remover, applied in small sections. Watch your dwell times and rinse thoroughly. On fiberglass gelcoat, a dedicated oxidation remover or cleaner wax can reduce mild chalking if you are not machine polishing.
Water spots on glass and stainless trim call for a different plan. Use a water spot remover with care on decals and plastics, testing in a discreet spot. Glass can handle a dedicated glass polish on a rayon pad. Plastics and polycarbonate vents need a hand touch. Finesse beats force here.
Drying with no marring
Drying a tall rig is where many owners put faint swirls into the finish. A blower speeds things up and keeps towels off the paint and gelcoat. If you rely on towels, use large, plush microfiber drying towels and blot rather than drag. Blow or towel purge mirror housings, trim edges, slide tracks, light bezels, and roof rails where water loves to creep out and spot later.
Oxidation, gelcoat realities, and paint correction on an RV
Paint correction on a coach is not a one-size-fits-all polish. Gelcoat is thicker but also more porous than automotive clear. It can absorb oils, it runs hotter, and it loads pads quickly. If the surface is chalky, a moderate cut compound on a foam or wool pad makes sense to level oxidation. On high-end coaches with painted graphics under clear coat, a standard car polishing workflow applies, just stretched out across big panels.
Machine choice matters. A 15 millimeter long-throw dual action polisher balances cut and control on broad flats. In tight eaves and around paint correction marker lights, a 3 inch machine or hand work wins. Keep RPM or OPM modest, and watch edge temperatures near decals. Free-floating edges and heat are where owners get into trouble. If your arm tells you the panel is warming past comfortable, pause. On older rigs with single-stage paints, expect color transfer on your pad and plan for more frequent pad cleaning.
Work small windows, about two by three feet, especially on oxidized gelcoat. Wipe residue clean before it dries. If dusting builds, switch to a cleaner product or add a drop of water to extend working time. When a finish cleans up with a single pass of a medium polish, do not chase perfection everywhere. RV detailing rewards restraint. Save the hero correction for the entry door, the front cap at eye height, and the patio side where family and guests gather.
Protection choices: wax, sealant, ceramic coating, and film
Once clean and corrected, you have several ways to protect the exterior. Old-school waxes still work, especially on gelcoat, but they fade faster in high UV areas. Synthetic sealants give better longevity, often three to six months depending on storage. Ceramic coating takes it further, offering a hard sacrificial layer that resists UV, chemical stains, and dirt adhesion for a year or more if maintained. Not every panel should be coated the same way. For example, vinyl decals behave differently. Some coatings play nicely on decals, adding hydrophobicity without drying them, while others can darken edges or stiffen the material.
Paint protection film shines on high impact areas, like the lower front cap and the dogleg behind the rear wheels. It stops chips and bug etching before they reach paint. On textured gelcoat, film adhesion can be tricky, and seams on large panels demand forethought. If you are coating over film, allow the film adhesive to cure per manufacturer instructions before applying ceramic coating.
Trim, metal, and plastics
Plastic trim benefits from a dedicated dressing or a trim-specific coating that offers UV resistance. Many RVs show greyed-out plastics at the front and roofline. A solvent-heavy product can streak down painted panels if you apply it heavy-handed. Wipe on, level, then buff lightly with a dry microfiber to prevent runs. Stainless steel polishing is a satisfying step. Use a non-abrasive metal polish and clean pads, following the grain if it is visible. Aluminum wheels may be clear coated or raw. Test a spot with a gentle polish; if the towel blackens, you are on bare aluminum and can work it brighter with a metal polish. If not, treat the wheel like paint.
Windows, mirrors, and cameras
RV glass accumulates mineral deposits and wiper marks faster than a car, simply due to exposure. Once you remove the mineral layer with a dedicated product, pure glass polish can clarify and reduce wiper chatter. Work around gaskets carefully. Cameras and sensor lenses respond to the lightest touch. Clean them with mild glass cleaner and a soft towel only. Hydrophobic treatment on side windows pays off, especially in rain. Avoid slathering sealant on windshield wiper contact paths. Treat those with a compatible product and test wipers before a long drive.
How Xtreme Xcellence Detailing plans a 40-foot coach
At shop level, planning beats muscle. On a 40 foot diesel pusher, Xtreme Xcellence Detailing breaks the work into quadrants and a roof pass. We aim for a roof and patio side on day one, street side and rear cap on day two if heavy oxidation is present. We map ladders and scaffold positions to minimize repositioning. If we are applying ceramic coating, we schedule correction and panel prep to feed the coating window. For example, front cap polish in late afternoon shade, wipe down with panel prep, then coat before dew sets. On long body lines with clear coat, we tape delicate edges, marker lights, and any vinyl pinstripe edges to protect them from pad drag.
One lesson the team leans on: never let the roof be an afterthought. A dirty EPDM rubber roof will drip chalky runoff down clean walls after the first rain. We wash and treat the roof first, rinsing thoroughly, then move to the sides. We protect solar panel wiring and cover the AC shrouds if the job calls for cutting compounds that could dust.
Xtreme Xcellence Detailing on decal-safe correction and protection
Decals are where many DIYers get nervous, for good reason. A heavy compound and a wool pad can lift or burn an edge in seconds. At Xtreme Xcellence Detailing we treat vinyl art as its own substrate. We avoid aggressive pads across edges, change to a softer foam, and reduce machine speed. Often, the right call is to hand polish with a mild cleaner on decals to remove oxidation without chasing every fine mark. Protection comes next. Some ceramic coating formulas are decal friendly; they keep colors rich and reduce black streaking. Others are too solvent-rich. If there is any doubt, we seal decals with a non-staining synthetic sealant and reserve ceramic for painted sections.
Clients sometimes ask for paint protection film over decals. It can work on simple shapes with fresh vinyl, but film tends to telegraph any texture underneath. When a decal is cracked or shrinking, film locks in the defect. In those cases, we recommend decal replacement first and film later.
Five essential tools that make RV exterior work safer and faster
- A stable platform: wide-base ladder or scaffold with non-marring feet
- A long-throw dual action polisher with 5 and 3 inch backing plates
- An extendable soft-bristle brush dedicated to roof and upper walls
- A blower or air mover to speed drying and purge seams
- Panel-safe tapes and masking materials to protect edges and decals
The five-step exterior detailing flow that holds up in the field
- Inspect and pre-rinse, starting at the roof, noting repairs and sensitive zones
- Pre-treat bugs and heavy grime, then wash methodically in sections
- Decontaminate targeted areas for sap, iron, and water spots
- Correct oxidation and refine gloss where it matters most
- Protect surfaces with the right mix of sealant, ceramic coating, or film
Wheels, tires, and wheel wells
Brakes on a heavy rig throw a different kind of dust. Acid wheel cleaners are risky on polished aluminum and decorative finishes. A pH-balanced wheel cleaner, agitation with dedicated brushes, and patience keep finishes safe. Tires on an RV are more than looks. They carry serious loads and live in sun. Dress with a product that dries to the touch and does not sling, and avoid heavy petroleum solvents that can hasten browning. In wheel wells, a rubber and plastic cleaner followed by a non-greasy dressing creates a neat shadow line and repels road film.
Awning casings, slide toppers, and seals
These are detail killers if you skip them. When you pull out of the driveway after a wash, they drip on your clean sides if they are still dirty. Clean awning casings with mild all-purpose cleaner, rinse, and dry. For fabric awnings, use a fabric-safe cleaner that targets mildew and allows a full rinse. Slide toppers deserve a flush even if you cannot safely access the top. A rinse from a step ladder to clear debris can prevent lines of dirt that streak your walls later. Gaskets and seals get a wash and a manufacturer-approved conditioner to prevent sticking and tearing.
Glass coatings and visibility
A good glass coating on the side windows transforms rainy drives. Water sheets off at highway speed and bug guts release easier. On the windshield, choose a product compatible with wiper blades and reapply as needed. When water spotting is chronic due to a hard local water supply, consider an inline filter on your hose. It reduces minerals at the source and makes drying kinder.
Storage, sun, and maintenance rhythm
UV is relentless. A coach stored outdoors in the Southwest will oxidize three to five times faster than a rig kept under cover in the Northwest. If you do not have indoor storage, an RV cover rated for your climate helps. Ventilation matters, so choose a breathable cover. For maintenance, a light contact wash every three to six weeks keeps protection working. A topper spray sealant on painted panels after washing, applied to a damp towel, refreshes hydrophobics and stretches the life of a ceramic coating or sealant underneath. On gelcoat that leans toward chalk, plan for a deeper polish every 12 to 24 months depending on exposure.
What to leave to pros and when to call it
Some jobs are better with a team and pro tools. Extreme oxidation on tall gelcoat walls takes muscle and coordination to finish without haze. Paint protection film on complex curves is a craft. Ladder setups around slopes or gravel pads invite risk. If you are unsure about ceramic coating on older decals or painted stripes, test a small patch off the eye line or ask a shop to evaluate the material. Professional auto detailing teams who also do rv detailing carry tapes that release cleanly from aged vinyl, meters to measure paint thickness, and scaffolding that makes upper panels safer to reach.
A field vignette: front cap rescue
One spring, a Class A rolled into the lot with a front cap that looked ten years older than the rest of the coach. The owner battled love bugs across three states. Bug acids etched the gelcoat, and the top twelve inches looked fogged. A heavy cut would have leveled the fog but at the risk of a different texture on that crown. We split the difference. After a citrus pre-soak and gentle scrub, we used a mild compound on a foam cutting pad, staying off the decal edges with tape and a light touch. Two passes cut the etching. A refining polish restored clarity. We sealed it with a ceramic coating known to bond well on gelcoat. The owner drove out with a front cap that matched the side walls. The next trip, those bugs wiped off at the first fuel stop.
Avoiding common mistakes
Avoid spinning a dry pad against gelcoat. It grabs and micro-mars, especially along seams. Keep pads primed and switch them out more often than you would on a small car. Do not let alkaline cleaners dry on glass or stainless. Rinse early and often. Resist the urge to scour white streaks with aggressive abrasives; find the source on the roof or a leaky seam and fix the problem first. When treating black plastic trims, work in thin coats to avoid streaks after the next rain. If your water is hard, do not fight it with speed. Work smaller sections and blow off standing water as you go.
Where interior detailing intersects exterior success
It may seem odd to think of interior detailing while you scrub an awning, but seals and vents move dust both ways. Clean AC filters and interior vents reduce the plumes that land on slide edges when you extend them. A tidy entry step and mat keep grit from grinding into the threshold paint. The two disciplines inform each other. A detailing plan that treats the coach as a single ecosystem usually produces the cleanest results outdoors.
Why a measured checklist works on big rigs
Checklists prevent backtracking on something the size of a studio apartment. They also keep elbow grease where it pays off. For daily drivers, it is tempting to chase perfection on every square inch. On an RV, you win by controlling the big variables: oxidation, water spotting, bug etching, and UV attack. A five-point flow that starts with inspection and ends with the right protection saves you hours, limits ladder moves, and leaves the coach ready for the next leg of the trip.
A second look at protection longevity
Numbers get tossed around for protection durability, but climate and storage dominate outcomes. A quality ceramic coating on painted RV panels can maintain strong hydrophobics for 12 to 24 months with routine topper use. On gelcoat, expect closer to 12 months before you want to refresh the top layer even though base protection remains. Synthetic sealants usually look lively for three to six months in full sun, longer in covered storage. Waxes fall between four and eight weeks in harsh conditions. Paint protection film sits in its own category. Properly installed, it protects for five to ten years, but it still asks for cleaning and gentle care.
A practical wrap-up from the bay
The best exterior detailing sessions feel unhurried, even when the clock says otherwise. Big panels reward patience and clean habits. The front cap, door side, and eye-level areas deserve your most careful polishing. Roofs, awning casings, and seals prevent the streaks that drive you mad after the first sprinkle. Decals ask for restraint. And once you deploy the right protection, maintenance becomes lighter work. Teams like Xtreme Xcellence Detailing build their days around these truths. Whether you tackle the job in your driveway or hand it off to a shop, the aim stays the same: a coach that sheds rain, shrugs off sun, and turns heads at the campground for reasons that go beyond shine.
When experience shortens the distance
There is no magic in auto detailing that only pros possess, but repetition sharpens judgment. Xtreme Xcellence Detailing has corrected chalky gelcoat that looked beyond saving, coated new paint on a custom bus conversion, and installed film on rock-chipped caps where touch-ups came first. The throughline is process. Test spots set expectations. Tape habits protect edges. Machine selection follows the surface, not the other way around. When you borrow that mindset at home, even a single Saturday can shift your RV from tired to tour-ready. And the next time a storm rolls in over the pass, you will watch tight beads skate off the glass and know the work paid off.
Xtreme Xcellence Detailing
23561 Ridge Rte Dr # O, Laguna Hills, CA 92653
(714) 472-3001
FAQs About Car Detailing & Paint Protection
How often should you service your car?
Regular car servicing is typically recommended every 5,000 to 7,500 miles or every 6 months, depending on your vehicle and driving conditions. In areas like Laguna Hills, CA, frequent driving and sun exposure make routine maintenance especially important.
What is the difference between waxing and ceramic coating?
Waxing provides a temporary layer of protection that lasts a few weeks to a couple of months, while ceramic coating offers long-lasting protection for several years. Ceramic coatings bond with your vehicle’s paint, delivering superior durability, gloss, and resistance to contaminants.
Is paint protection film worth it?
Yes, paint protection film (PPF) is a great investment for preserving your vehicle’s exterior. It provides a durable, transparent layer that protects against rock chips, scratches, and road debris, helping maintain your car’s value and appearance.
How long does a full car detailing take?
A full car detailing service typically takes between 3 to 8 hours, depending on the vehicle’s size, condition, and the level of service required. More advanced services like paint correction or ceramic coating may require additional time.
How often should I get my car detailed?
For optimal results, it’s recommended to have your car detailed every 3 to 6 months. This helps protect your vehicle from environmental damage and keeps it looking its best year-round.
Does ceramic coating eliminate the need for washing?
No, ceramic coating does not eliminate the need for washing, but it makes cleaning much easier. Dirt and grime have a harder time sticking to the surface, allowing for quicker and more effective maintenance washes.